Peanut Butter Jelly Time
OK…its time for textures. We have everything we need for a textured 3D model in the .SU3 format except for textures – yes…we will have to add color maps for models that don’t have textures…but all in due time. Right now…textures.
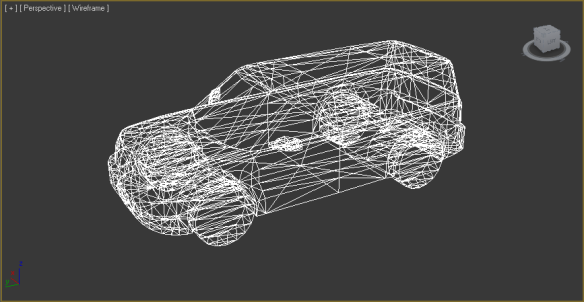
So, lets say we have a 3D model with geometry:
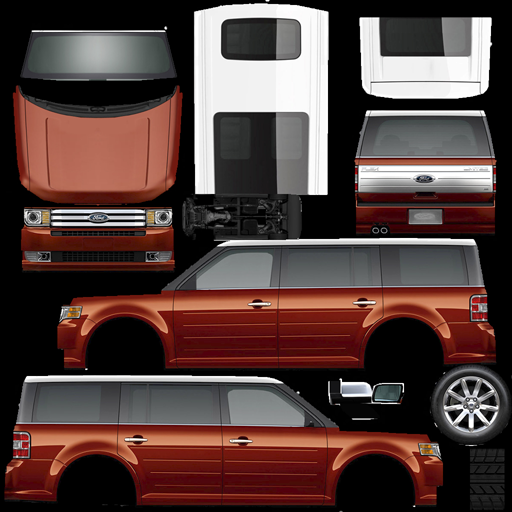
Now we want to add a texture map to it.
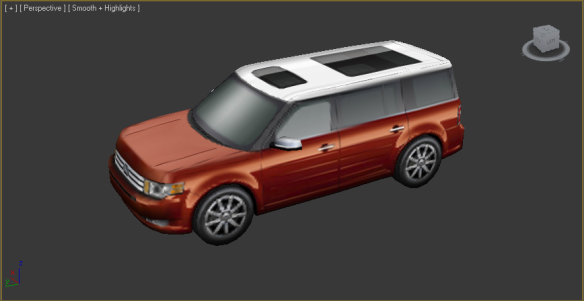
If all comes out right, we should get this when we render the model:
A not so long winded texture discussion – hopefully
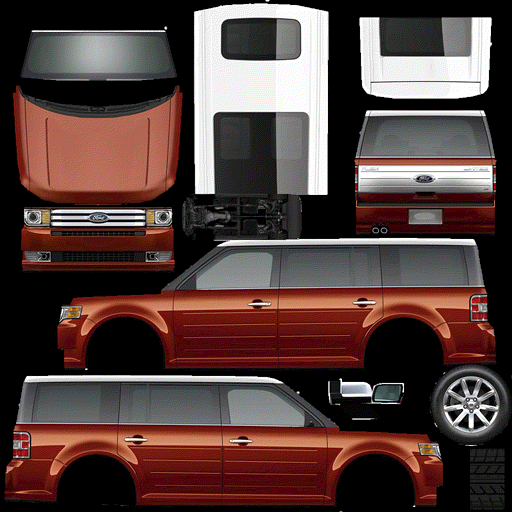
A texture is simply a bitmap. That’s it. In the end, just a collection of pixels. Usually the width and height of the bitmap (almost always) is a power of 2 – like 64×64, 128×128, 512×512, 512×128, etc. The Ford Flex model texture is 512×512. As you probably already know, the size of the texture is relatively unimportant – the larger the texture the more detail you can pack into it. The problem is, the larger the texture, the more work the 3D renderer has to do to draw the model. There is always a trade off between texture size and speed / performance.
So, what format can a texture be in? THAT can end up being a complex question. Ultimately, the texture will end up in the format of the actual frame buffer of the graphics controller – but it will undergo a lot of changes along the way – getting sliced, diced, stretched, pulled, pushed, wrapped and mapped onto the triangles that make us the 3D model. So, does it really matter what format the texture is in to start with? Well…actually yes…it does. You see, the texture has to be pushed across the “host” memory interface into graphics memory prior to it getting used by the 3D renderer, so…in this case, while a bigger texture map gives you better visual results, smaller textures move across the host interface faster – again…a trade off.
Now…the first and obvious question that comes to mind is this…why can’t I just use PNG and JPG images for my texture map? Well…you can…and…you can’t. How’s that for an answer?
When you create your textures using whatever tool you use – PhotoShop, Z-Brush…whatever, you will most likely save out your texture as a pretty common format – like a JPG or PNG. You might even save out as a GIF (why…I don’t know…but you might). Most 3D engines, however, are going to require that you convert from one of these common formats into something it can actually understand and use. SOME 3D engines will directly perform the JPG / PNG / GIF / blah blah conversion for you…but Su3De won’t.
Never fear, however, the Su3De .SU3 3D model conversion utility, however, will be DELIGHTED to do the texture conversion for you…
Now, the next question is – What will the SU3 model conversion utility convert the texture into? Tongue in cheek answer – does it matter…do you really care? Oh…you do? Well here is the answer then.
Bitmaps 101 – kind of
There are many different ways to express pixels in a bitmap. Too many in fact. For the purposes of further discussion R = Red component, G = Green component, B = Blue component and A = Alpha component. As you are almost certainly aware, Alpha is the amount of transparency of the pixel with 0 being completely transparent and “maximum value” (whatever that is based on the bit depth) as fully opaque.
The lowest hanging fruit and simplest of the bitmap formats would be a straight 32-bit ARGB value. This would mean that there would be 8 bits for each color component as well as the alpha component. This ostensibly yields 4 billion possible color variations – again…kind of…but not really. In reality, the number of possible color variations will be dictated by your LCD screen – or display device. In many cases, the LCD panels are 18-bit yielding only 262,144 possible colors. Most of the latest LCD panels are 24-bit wide which yields around 16.8 million possible colors. Simply food for thought when picking color depths for textures.
So…lets look at a 32-bit color depth texture:
This is an example of “direct color”. In this example, each pixel requires 4 bytes to represent the color information. So, for our 16×8 texture, the requirement is 512 bytes. Seems like a lot of memory for such a small bitmap, doesn’t it? Now consider a texture that is 512×512 pixels. At 32 bit color, the memory requirement is a whopping 1MB – just for a single texture…like the Ford Flex texture above. Is there a better way? I daresay…there is.
What if we used LESS memory for each pixel…I mean do we REALLY need 8 bits for each component? What if we cut the color depth in half? Like use 16-bits per pixel instead? Is this workable? In fact, yes…it is. Many / most of the 3D engines we work with will accept wither 32-bit or 16-bit color. The trade-off? The number of colors start becoming seriously limited. Let me explain / show.
With 32-bit color, we have 8 bits for Red, 8 bits for Green and 8-bits for Blue and 8-bits for Alpha. That means we have 256 SHADES of Red, 256 SHADES of Blue and 256 SHADES of Green to work with. In many images, there are subtle color gradients that aren’t immediately obvious, because they blend together when we see them. Our brain does that nifty little trick for us… When we reduce the color depth, we reduce the number of “SHADES” of a particular color and this can create nasty artifacts called “banding” that makes images look…well…not so hot. Before we continue, lets talk about a couple of other color depth formats that are “common” and ones that we will likely be supporting with Su3De:
- RGB565 – here we have 5 bits of Red (32 shades), 6 bits of Green (64 shades) and 5 bits of Blue (32 shades). This results in 16 bits with no alpha channel. This format is quite common.
- RGB555 – 5 bits of Red (32 shades), 5 bits of Green (32 shades), 5 bits of Blue (32 shades) and an unused bit -or- the bit can be used for a “global” alpha value – i.e. on or off – interesting effects can be performed with this on the right graphics controller.
- ARGB4444 – 4 bits of Alpha, 4 bits of Red (16 shades), 4 bits of Green (16 shades) and 4 bits of Blue (16 shades). This is a format that is actually fairly common as well – for example the Sony Play Station Portable uses this format.
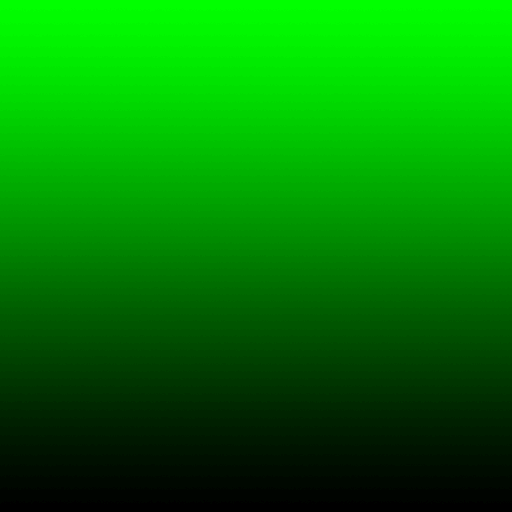
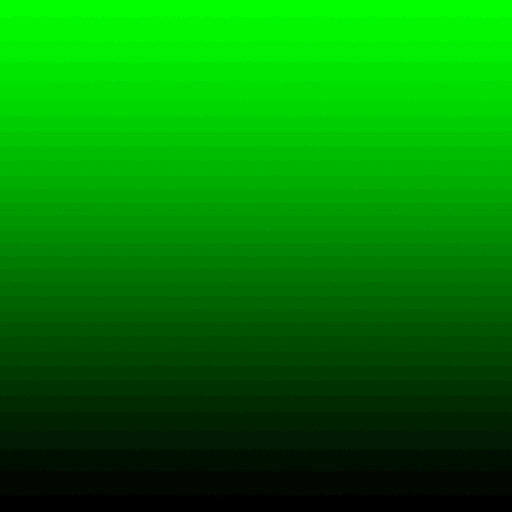
I want to give you an example of these formats with a “worst case” scenario – a fully saturated color (I chose green) gradient. Here, you can clearly see the banding in effect. Then, I will show you a real texture – the Ford Flex – in the various formats.
First – lets look at a 32 / 24 bit example – ARGB8888 – here we have 256 shades of green.
Now – lets take a look at RGB565 – here we have 64 shades of green and we can clearly see some banding. Remember – green has an extra bit for the other primary colors (red and blue) you lose half your colors – down to 32.
Here is RGB555 – 32 shades of green and wow…banding is pretty obvious. This is a common color format in embedded graphics systems.
Here is RGB444 – 16 shades of green…and well…it isn’t pretty.
OK…so this is an example of “worst case” scenarios. A saturated color gradient…but it is instructive to see. Now…I want to digress another moment and talk about 8-bit color.
8-bit “indexed” color and palettes
Wouldn’t it be nifty if we could store bitmaps using only a SINGLE byte? If we could do this, a 512×512 texture would only be 256KBytes instead of 512KBytes for 16-bit color formats (RGB565/RGB555/RGB444) or 1MByte for 24/32-bit color.
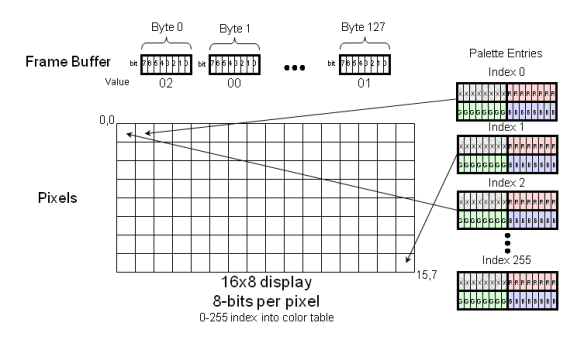
Some graphics controllers DO allow you to use a single byte for a frame buffer / texture / bitmap – whatever. This is called “indexed color” and it is like a “box of crayons”.  Imagine a box of crayons (256 of them in fact) and every crayon is assigned a unique number from 0 to 255. Each crayon can be any color you want it to be – without color depth limitations (OK…it is usually RGB888). In this case, you can create high quality images using a small amount of memory. Take a look at the following example:
When a value between 0 – 255 is written into the graphics controller’s memory, the graphics controller will go to a table called a “palette” and will index into that table and pull out the RGB value for that particular pixel. Clever, huh?
So…what does a green gradient look like with 256 colors? It looks JUST like its RGB888 counterpart because you can have 256 shades of green in an 8-bit color palette. For more on indexed / palette color click here.
Back to our regularly scheduled programming
OK, so let’s look at our Ford Flex bitmap in the various color depths.
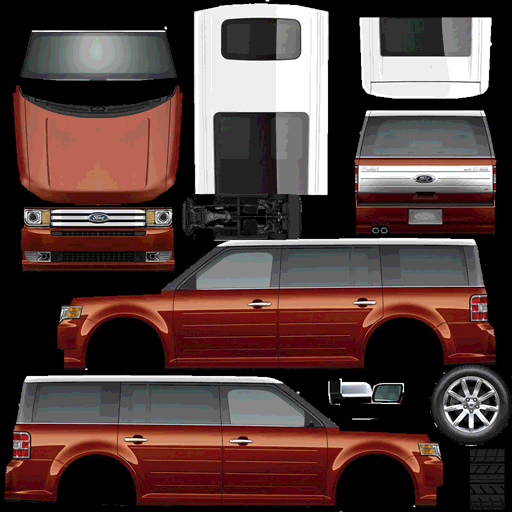
Here is full 24-bit / 32-bit color:
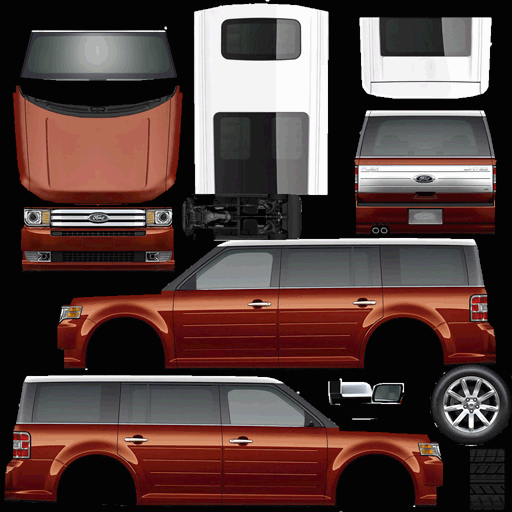
Here it is in 16-bit color – RBB 565 format. You can see some image deterioration, but the image quality is quite acceptable given the fact that you knocked the memory size for the texture in HALF!!!
Here is the Ford Flex texture in RGB444 format. Now you can start to see some serious deterioration of image quality.
OK…and finally, here is an 8-bit version – which is indexed color / palette driven. You can see again, that this is quite acceptable and given the massive savings in memory and if you have a talented graphics artist around -or you are handy with PhotoShop – then you can probably “tweak” this image to make it work well. The savings in memory for this texture is 75% so it is certainly worth the effort if your graphics controller supports 8-bit textures.
Dithering – a neat trick!
A neat trick that we often use when using 16-bit and even 8-bit color is “dithering”. Dithering – according to a nice wikipedia definition – is:
“…an intentionally applied form of noise used to randomize quantization error, preventing large-scale patterns such as color banding in images”
Click here to jump to the full wiki page on dithering.
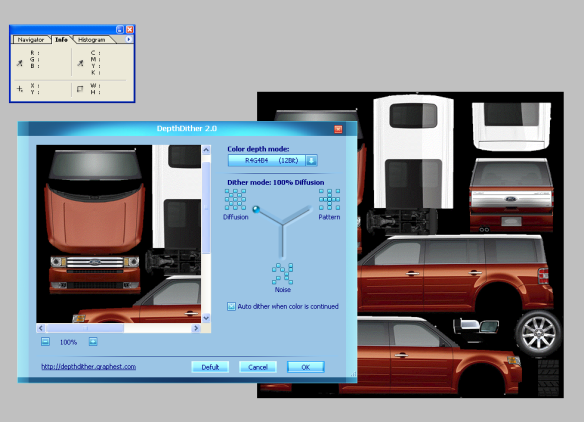
So…how do you dither a 16-bit or 8-bit image? One nifty way is a free PhotoShop plugin called “Depth Dither” from Graphest. Graphest seems to be gone…but the plugin is still floating about in places like cnet and can be downloaded from here. Here is depth dither in action in PhotoShop:
Here is the result when we apply Depth Dither to the RGB444 Ford Flex texture. Compare this to the RGB444 image above. Pretty amazing…right?
Another way to apply “dither” to 16-bit and 8-bit images is to simply go into PhotoShop -or- Gimp and apply 1% or 2% Gaussian “noise” to the image. We have done this many times and it has yielded good results on SOME images.
Once again…back to our regularly scheduled programming
The purpose of all of these “bunny trails” is to form the basis for the 3D model SU3 conversion tool we are developing. Specifically, what texture formats will we support and what, if any, conversions will we do on the image data? These are key questions that must be answered. So, to short circuit the long explanations, we plan to support the following “uncompressed” image formats in Su3De:
- ARGB8888 – 8 bits each of alpha, red, green and blue. This format is surprisingly not all that common. Usually, the red and the blue are swapped and this yields:
- ABGR8888 – same as ARGB8888 except the red and blue values are swapped – this is a pretty common format.
- BGRA8888 – yes…sometimes the alpha is the last byte and this changes the ordering of the data.
- BGR888 – 8 bits of red, green and blue, no alpha – 24-bit format – not so common as a “direct” format – will need conversions on certain graphics controllers.
- RGB888 – same as BGR888 with red and blue swapped
- BGR565 – 16-bit format – no alpha.
- RGB565 – 16-bit format – no alpha.
- BGRX5551 – 16-bit format – no alpha – upper bit unused
- BGRA4444 – 16-bit format with alpha – 4 bits of each
- BGRA5551 – 16-bit format with 1 bit of alpha
- BGRX8888 – 32-bit format with no alpha – essentially 24-bit color packed into 32-bits – upper 8 bits unused
- I8 – 8-bit indexed color – palette entry must be supplied
Other formats might be added / supported as needed to round out color depth formats.
The methodology for conversion will be loading a PNG, JPG, GIF, whatever into the SU3 model conversion tool along with the .OBJ file – usually this will be automatically supplied in the corresponding .MTL file, then you will select the color depth for the texture based on a drop down list – and then voila…the SU3 will contain your model and texture in the desired format.
In the NEXT entry, I will show what the chunk header and chunk should look like for a texture and we will also cover COMPRESSED textures. Texture compression is another very interesting topic and refers to the ability of the graphics controller to handle texture decompression in a hardware unit -rather than being handled by the processor directly – which would really defeat the purpose because then we could just use PNGs or JPGs directly…so something to look forward to.
One more thing
I wanted to give an example of the kind of 3D that Su3De will be doing on an actual embedded device…so here is a reference board with THREE LCDs running a demo that we developed using a basic graphics library with 3D primitives. This is the Jade MB86R01 graphics controller driving the three displays. This is EXACTLY the sort of thing Su3De is for. Enjoy:

